|
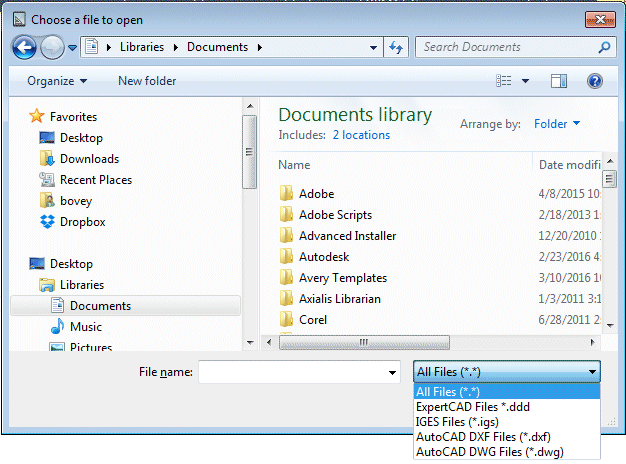
The File filter menu on the open dialog.
ExpertView LE can open:
- ExpertCAD drawings (*.ddd)
- AutoCAD drawings in binary DWG format (*.dwg)
- AutoCAD drawings in ASCII DXF format (*.dxf)
- ExpertCAM history files (*.cam)
- IGES 2D and 3D data files (*.igs)
- ExpertCAD 3D data files (*.3d)
- Prospector and ExpertCAD design database files (*.pdb)
- ExpertCAM and Prospector CL data files (*.clf)
Note: File extensions are not required to open drawings. ExpertView LE automatically determines
the format of a file and if it is possible to open the file, it will.
|
|
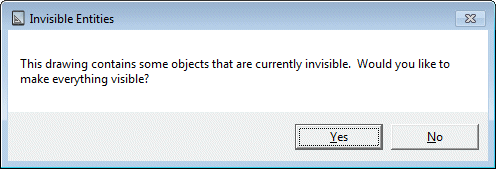
This dialog will be posted once a file is opened if there are invisible entities in the drawing. Click Yes if you wish
to unhide all the entities.
|
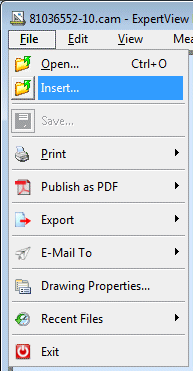
Insert...
|
|
Into the current design you are viewing, you can insert (add) another design to it. This can be useful in cases where you
wish to overlay one design on top of another to visually inspect the differences in the drawings.
|
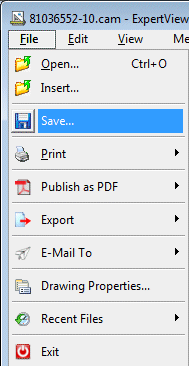
Save...
|
|
If you have added markups (text notes, leader notes) to the drawing, then you will have the option to
save the drawing to a disk file. The standard Windows Save dialog will be presented for you to choose or
enter the name of the file to save your changes.
|
|
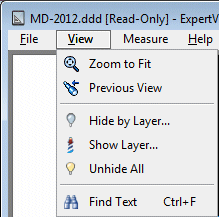
Zoom to Fit - change the scale and position of the drawing so that it fits to the available screen size.
Previous View - change the zoom scale and position of the drawing to the previous view parameters.
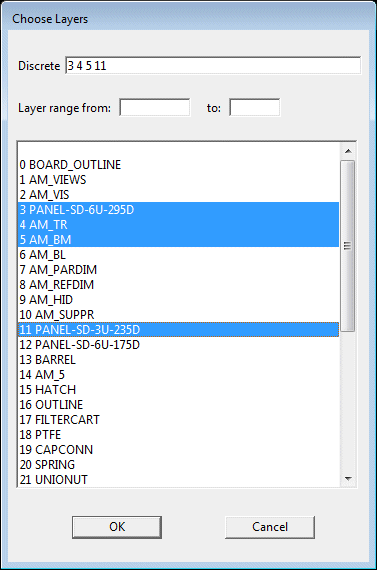
Hide by Layer... - hide one or more layers in the drawing. The layer selection dialog will be posted to allow you to
choose one or more layers to hide:
|
|
The layer selection dialog lets you select one or more layers. The Windows-standard techniques for using Shift-Click and Ctrl-Click to select
contiguous or non-contiguous selections may be used to choose which layer(s) to hide.
|
Show Layer... - blinks entities that are on the layer(s) chosen in the layer selection dialog that is posted.
Unhide All - makes all entities in the drawing visible. This is useful if you had previously hidden one or more layers
or if you are aware that there are hidden entities in the drawing.
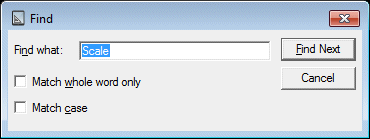
Find Text - finds a text note on the drawing. The Find Text dialog is posted:
|
|
The Windows-standard Find control is posted. Enter the text you wish to find and click Find Next. If the text exists on the drawing, the
view will change so that text note is centered in the view and the zoom factor adjusted so it is clearly legible. Click Find Next again to find
another instance of a note that may have the same text string you entered.
|
|
About indicating points - when you are asked to indicate a point by clicking the mouse or tapping on the screen, the actual point
will 'snap' to a location if there is geometry sufficiently close. The point location is based on a bias according to this
hierarchy:
Intersection of 2 or more lines.Point on a line nearest the cursor.Point on a vertex of a line nearest the cursor.Point in "free space".
The location of the cursor is reported in the status bar:

If you hold down the Shift key, the coordinates of the cursor reported in the status bar will 'snap' to the geometry nearby:
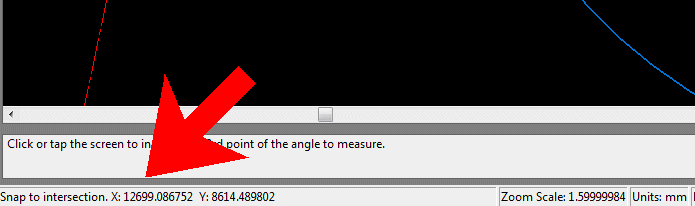
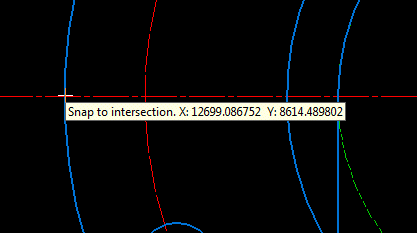
If you hold down the Ctrl key, the coordinates of the cursor are reported in the status bar and on-screen:
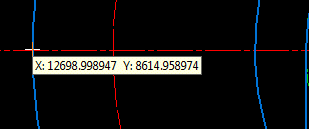
Holding down the Shift and Ctrl key causes the coordinates to 'snap' to nearby geometry, report the coordinates in the status bar and on-screen:
|
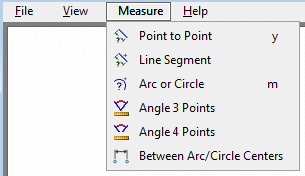
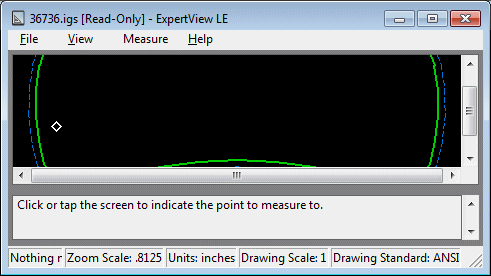
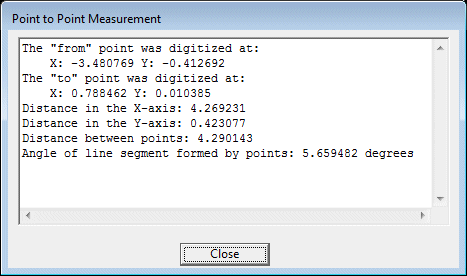
Point to Point - measure the distance between 2 points on the drawing that you will indicate with mouse clicks or taps on the screen:
|
Indicate the 1st point to measure from...
|
Indicate the 2nd point to measure to...
|
The Measurement information dialog is posted:
|
Note that the 'y' keyboard short cut performs this same measurement function.
|
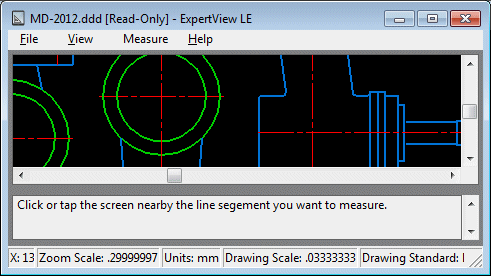
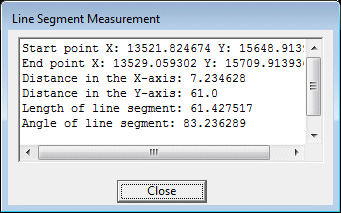
Line Segment - measures the length of a line segment you will indicate by clicking or tapping on the screen:
|
Indicate line segment you wish to measure by clicking on it. The line segment measurement dialog is posted:
|
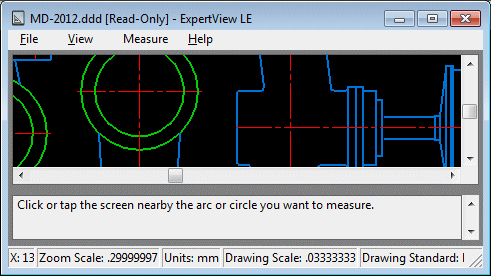
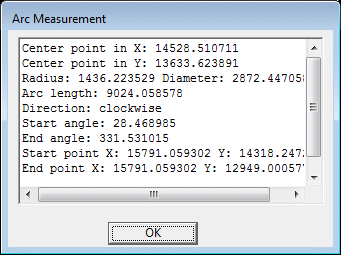
Arc or Circle - measures the arc or circle you will indicate:
|
Indicate arc or circle you wish to measure by clicking on it. The arc/circle measurement dialog is posted:
|
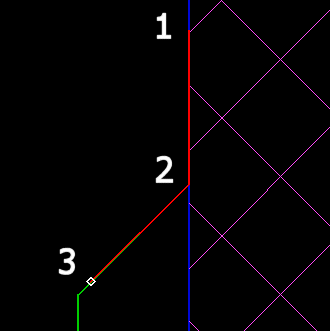
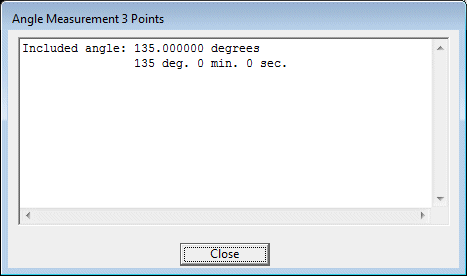
Angle 3 Points - measure the included angle formed
by 3 points you will indicate on the screen. You'll be prompted to
indicate 3 points:
The point that is on the 1st leg of the angle to measure.The point that is the vertex of the angle to measure.The point that is on the 2nd leg of the angle to measure.
|
Measurement dialog is posted:
|
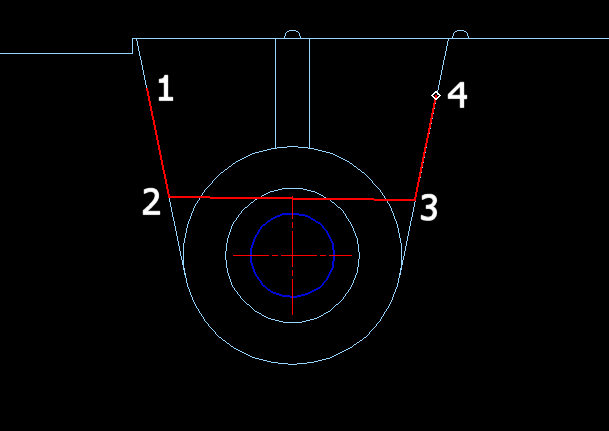
Angle 4 Points - measure the included angle formed
by 4 points you will indicate on the screen. You'll be prompted to
indicate 4 points:
The point that is on the 1st leg of the angle to measure.A 2nd point on the 1st leg of the angle to measure.The point that is on the 2nd leg of the angle to measure.A 2nd point that is on the 2nd leg of the angle to measure.
|
Measurement dialog is posted:
|
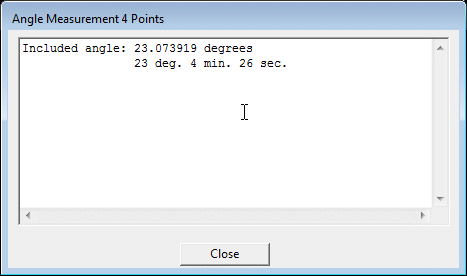
Between Arc/Circle Centers - measure the distance between 2 arc/circle pairs:
Indicate the 1st circle or arc to participate.Indicate the 2nd circle or arc to participate.

|
Measurement dialog is posted:
|
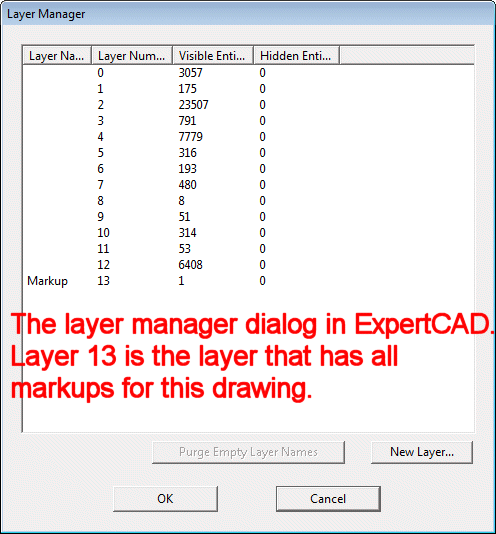
About Markups....markups are notes that you can add to the drawing you are viewing. When you open a drawing, a layer is chosen to be the
markup layer. This is shown in the status bar:

This layer is assigned the name 'Markup' as well. When the drawing with markups is returned to a designer who uses ExpertCAD, they can isolate all
the markups for the drawing by looking at the designated 'Markup' layer:
|
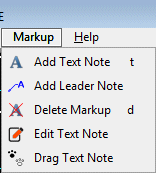
Markup Menu
|
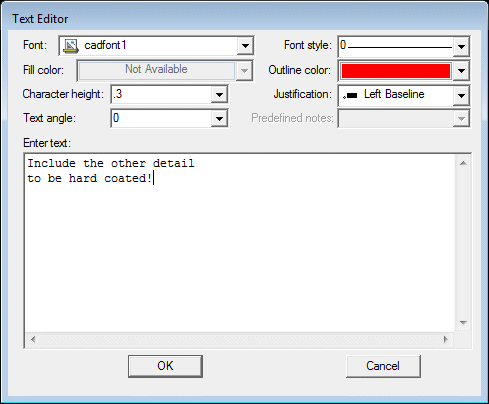
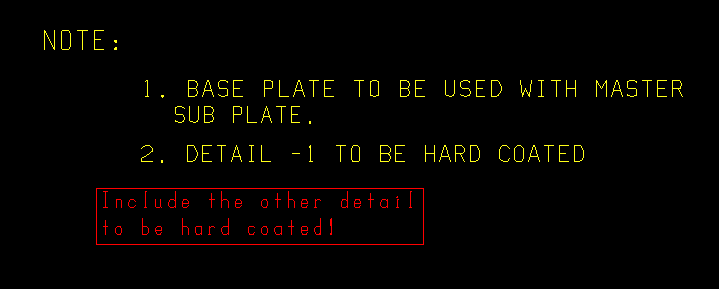
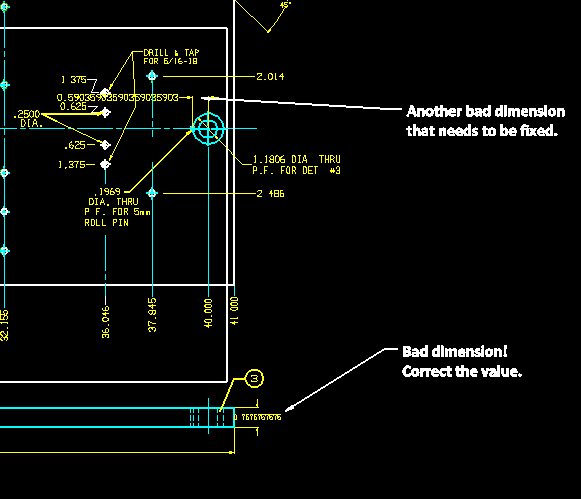
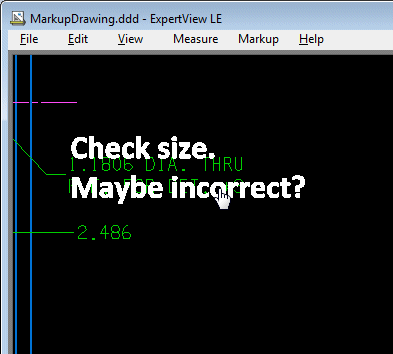
Add Text Note - add a text note to the drawing:
Indicate where you would like to place the text note by tapping on the screen or clicking the left mouse button.Choose the text characteristics and enter the text for your note:
Results:
Tip: The 't' keyboard command is a shortcut for adding a a text note.
|
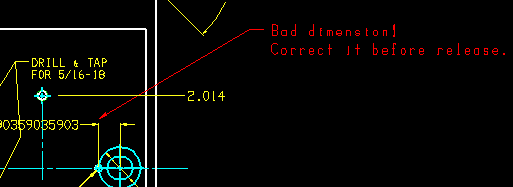
Add Leader Note - add a leader note to the drawing:
Indicate what you want to point to with the 1st click.Indicate where you want the text for the leader note with the 2nd click.
Choose the text characteristics and enter the text for your note:
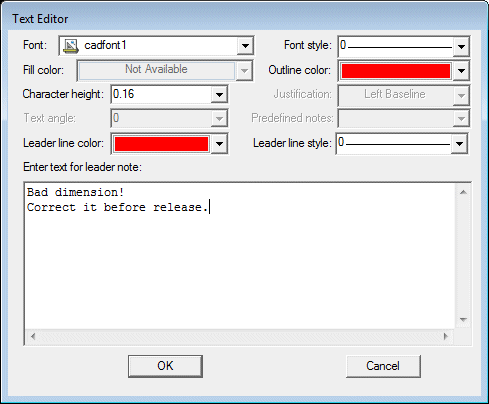
Results:
|
Delete Markup - delete a markup entity:
All markups on the drawing are highlighted.
Click on the highlighted markup you wish to delete.
Tip: To quickly delete additional markups, hit the space key to repeat the delete operation or hit the 'd' key (same function as choosing delete from the menu).
|
Edit Text Note - edit the text of a markup on the drawing.
All markups on the drawing are highlighted.
Click on the highlighted markup you wish to edit.
Make your edits in the text edit dialog and click OK when you are finsihed:
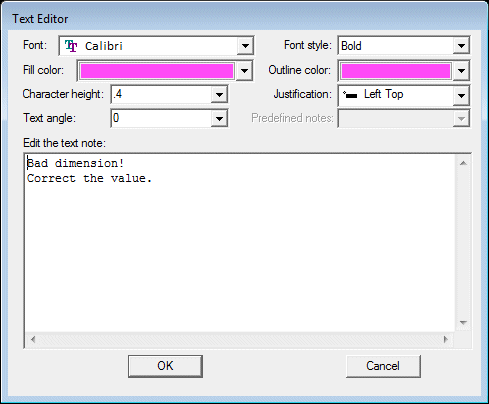
Tip: The edit function is useful for changing any of the characteristics of the text markup. That's handy for cases
where you made the text too big or too small.
|
Drag Text Note - dynamically reposition a text note.
All markups on the drawing are highlighted. Click on the highlighted markup you wish to move, hold the mouse button down and drag it to a new position:
|
Keystroke
|
Action
|
d
|
Delete a markup on the drawing.
|
l
|
Clear the screen and redraw all entities.
|
m
|
Measure the distance between arcs/circles.
|
t
|
Add a text note as a markup to the drawing.
|
Z
|
Increase the zoom level.
|
z
|
Decrease the zoom level.
|
c
|
Center the drawing. Drawing is repositioned so that the location of the cursor is centered on the screen.
|
Tab
|
Refresh the view.
|
Arrow keys
|
Pan the drawing in the direction of the arrow key pressed.
|
Ctrl+F
|
Find a text note on the drawing.
|
Ctrl+O
|
Open a drawing by browsing for the file.
|
Ctrl+P
|
Print the drawing.
|
Ctrl+S
|
Save the drawing and all markups to a file.
|
Ctrl+Y
|
Roll forward (redo) the last change that as a result of an undo.
|
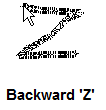
Ctrl+Z
|
Roll back (undo) a change to the drawing.
|
F1
|
Opens this help document in your browser.
|